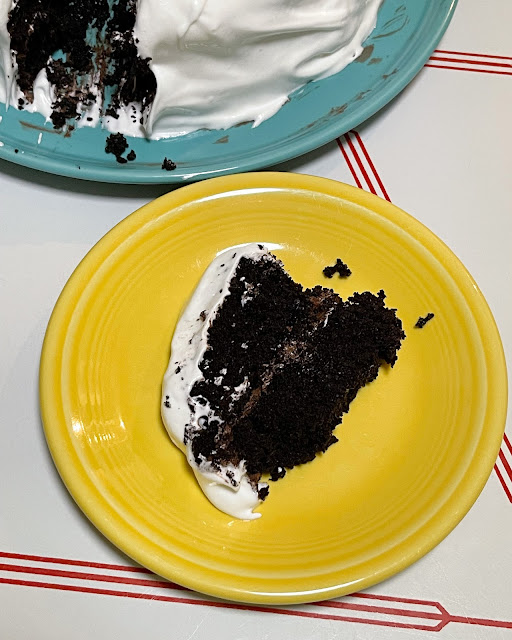
I worked at a Hostess discount bakery for a few months in high school. Whenever the food was about to expire, we pulled it from the shelves and threw it into grocery carts. Farmers would come buy the food (usually just the bread) for their animals. You could buy a grocery cart amount of almost-expired food for just $10. One night I bought a cart amount of food and loaded it into the trunk of my car. I drove a 1977 Triumph Spitfire, and the trunk was smaller than the cart. I didn't anticipate that when I bought the food, but I made it work. I drove home and surprised my family with a trunk full of Hostess treats. Sadly, I don't remember snagging any Ding Dongs since those were popular sellers. I think we did have a lot of the orange cupcakes, though. Also, I'm pretty sure these processed desserts didn't expire as quickly as their date stated!If you've never had a Ding Dong, they are a round chocolate cake, covered in a chocolate frosting shell, filled with cream. This cake is what would happen if you turned a Ding Dong inside out-- chocolate in the middle, cream on the outside.
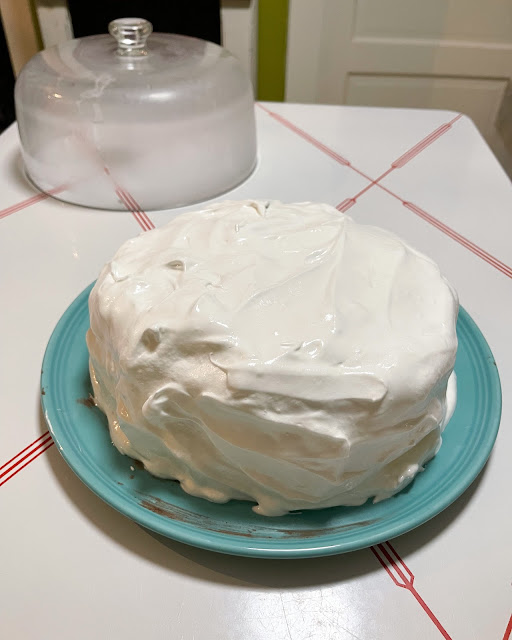
Inside Out Ding Dong Cake
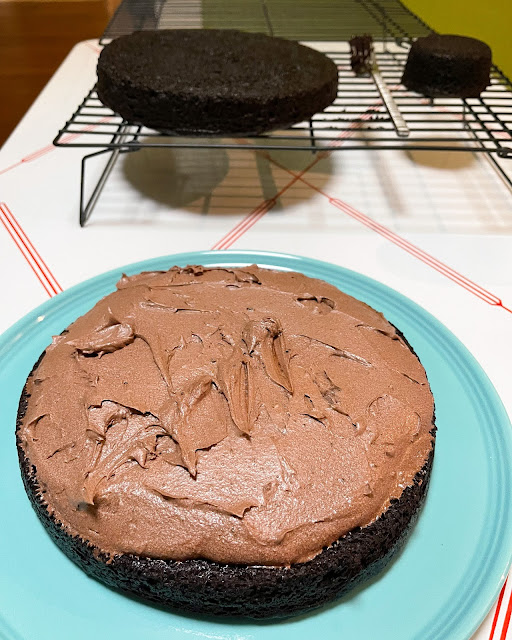
There are three parts to this cake: the chocolate cake, the chocolate frosting for the filling/inside, the white frosting for the outside.
Chocolate Cake:
- 2 cups sugar
- 1 3/4 cups flour (I used gluten-free one-for-one flour)
- 3/4 cup dutch processed cocoa
- 1 1/2 teaspoons baking powder
- 1 1/2 teaspoons baking soda
- 1 teaspoon salt
- 2 eggs
- 1 cup milk
- 1/2 cup oil
- 2 teaspoons vanilla extract
- 1 cup boiling water
- Heat oven to 350 degrees. Grease two 9 inch round pans.
- Stir together sugar, flour, cocoa, baking powder, baking soda, and salt into a large bowl.
- Add eggs, milk, oil, and vanilla. Beat on medium speed for 2 minutes.
- Stir in boiling water. Pour batter into pans.
- Bake 30 to 35 minutes or until wooden pick inserted in the center comes out clean. Cool 10 minutes then remove from the pans to cool on wire racks. Cool completely before frosting.
Cream Frosting for the Outside of the Cake:
Milk Chocolate Frosting for the Filling:
- 1/3 cup of dutch processed cocoa powder
- 1/2 cup (1 stick) of butter
- 3 cups of powdered sugar
- 1/3 cup of milk
- Using a hand mixer, combine the cocoa powder and softened butter.
- Alternate adding the powdered sugar and milk.
When the cake has cooled, frost one of the cake tops with the chocolate frosting, then set the other cake on top. Frost the entire outside of the cake with the cream frosting.
I poured some of the batter into two ramekins for my girls to have mini cakes!
When I planned this cake, I had the intention of it tasting like an inside out Ding Dong, and it did not disappoint! I made mine with gluten free flour and plant based butter in case you want to attempt the same. It was hard for the four of us not to eat it in one sitting!