Friday, October 10, 2014

Nursery Tour

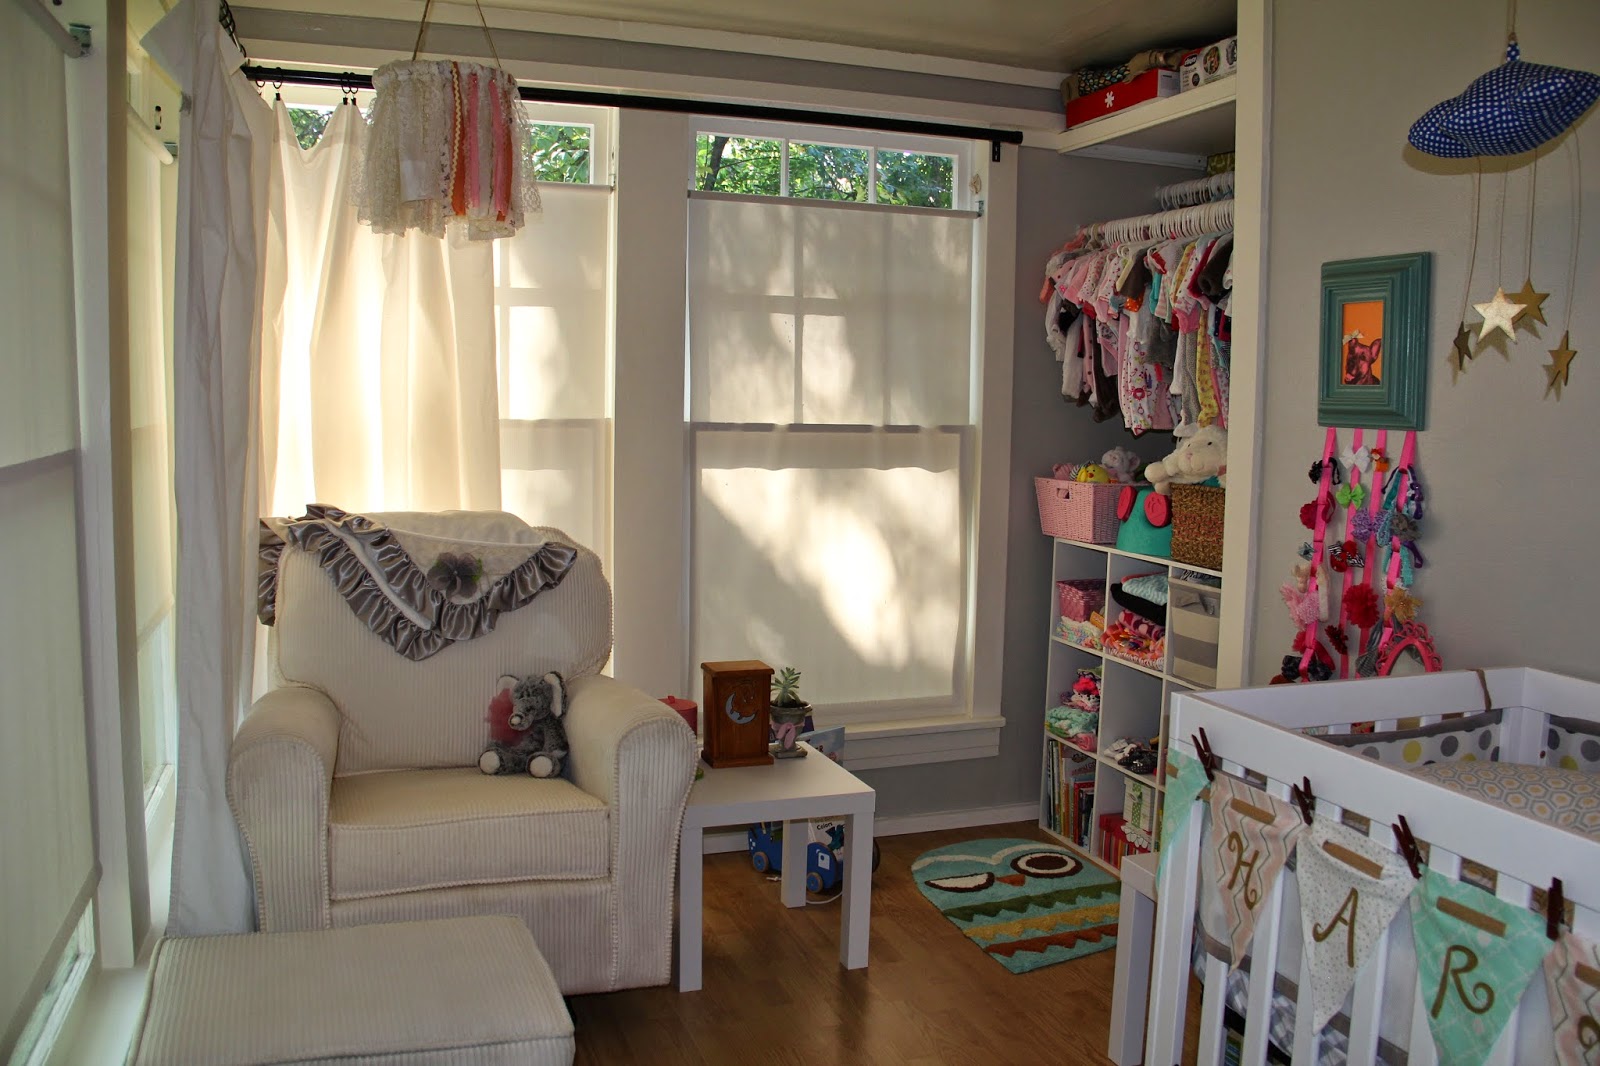
Here is a tour of Harlow's nursery!  The room itself is small with two walls of windows, so we tried to keep the design simple and space friendly.  The walls are light grey with white trim to keep things light and bright.

Chair & Ottoman: It's from a scratch and dent furniture store.  We got it for a great deal.  It doesn't photograph very well, because it's corduroy and catches the light kind of weird.  They have this exact same set at Babies R Us, but we paid way less.  Be open to looking for furniture in unusual places!
Side Table: Target
Lace Mobile: Tutorial
Moon Nightlight: Made by my dad when I was little
Blanket, Elephant, Succulent: Gifts


Crib: Walmart
Rug: Zulily (no longer available, but they always have fun rugs)
Harlow banner: gift
Bow Holder/Pet Portrait: Tutorial
Cloud Mobile: Tutorial
Name Canvas: I painted two canvases and then glued the smaller canvas onto the larger canvas.

Rug: Modcloth
Cube Shelf: Walmart

Baby clothes are just too cute to cover up, so we left the closet open.  I sewed a curtain to hang in the back for a pop of color.  The fabric subtlety peeks out from behind the clothes and the cube shelf.  We hung two clothes rods with larger sizes in the back, rather than storing the clothes she's not wearing yet.  That helps me keep up with what she has so I don't buy more than she needs.


Pillows: Made by my mom with fabric from Hancock Fabrics
Quilt: Made by me with a tutorial coming soon
Sheets: Target
Mesh Bumper: Target
Boppy Newborn Lounger: Target
***I know the baby isn't supposed to sleep with pillows or anything in the crib, so please don't worry about that.  It's just for decor while she's not in the crib. :)

Changing Table: Hand-me-down from cousin
Changing Pad Cover: Target

Cardboard Letters: Gift from sister-in-law Loren who got them at Hobby Lobby and dressed them up
Fabric Hoops: I picked out fun fabric from Hancock Fabrics and Hobby Lobby and put them in embroidery hoops.  It's super easy, but if you absolutely need a tutorial, I'm sure there's one on Pinterest.
Cacti in Clay Pots: I used a gold Sharpie to draw dots around the top of the pots for a little sparkle.

Vintage Dress: This was mine from 1985.
Canvas: Gift from my sister-in-law Shannon


I love coming into her room and just standing and looking at everything.  I know it won't always stay this organized and clean, but I hope it gives Harlow the same calming feeling that it gives me when I'm in the room.

Wednesday, October 08, 2014

Lace Mobile


I wanted something to hang over the chair in the nursery and saw a few different versions of a lace mobile on Pinterest (don't you love Pinterest!).  Here's the version I came up with.

Grab some scrap fabric and/or lace and an embroidery hoop.

I tied strips of lace and ribbon onto the embroidery hoop and then tied twine onto the hoop for it to hang from.

I tied the three pieces of twine into a knot at the top.

Then hang it!  I used a hook that screws into the ceiling.


You could do lots of variations of this just by picking different fabric.  It would make such a pretty chandelier if you hung a light inside!


Tuesday, October 07, 2014

Cloud Mobile


The second project I finished for our baby's room was her mobile.  I see cloud mobiles all over Pinterest.  I knew I wanted to do something similar, so this is what I came up with!

Here's how I made her cloud mobile:

1. Cut stars out of faux leather (or vinyl).  I used a thick faux leather so the stars wouldn't fold in to themselves.  I drew the stars by hand and then traced them to have an exact match for each star, since I was gluing two pieces together.

2. Use metallic gold spray paint so the stars are all the same color and have a fun shine!

3. Draw a cloud template on newspaper. Trace the template onto your fabric.  You'll need to also trace and cut a mirrored piece of the cloud since you'll be sewing two sides together (just flip the cloud to the other side for the second piece of cloud).

4. Sew the two cloud pieces together, right sides facing .  Leave a small opening so you can turn the cloud right side out.

5. Snip all around the edges, making sure not to snip into the thread.  This will help make smoother edges when the cloud is turned right side out.

6. Flip the cloud right side out, and fill with fiberfill or stuffing of choice.  Then, hand-stitch the opening closed (not pictured).

7. Take string or fishing line or plastic jewelry wire to hang the stars from the cloud.  I used  old guitar strings.  The great thing about guitar strings is they have holes on the end that are perfect for sewing onto the cloud.  Hand-stitch the strings onto the cloud.  I had four strings, and I made each a different length.

8. Glue the stars onto the other end of the strings (like a sandwich).  I used E6000 glue and used clothespins to hold the stars to the strings as the glue dried.

9. Create a loop for your mobile to hang from the ceiling.
a) Cut a strip of fabric about two inches wide and a few inches long.
b) Fold the strip in half, and sew the sides together.
 c) Turn it right side out to have a tube.
 d) Fold the tube in half.
 e) Fold in half again.
 f) Create a loop, and hand stitch closed.

10. Hand stitch the loop to the center top of the cloud and tie twine (or yarn or whatever you want) through the loop.

11. FINALLY-- Hang the cloud!  I used a hook that screws into the ceiling.

I'm really happy with how it turned out and think it can be used as decor once she no longer needs a mobile!


Related Posts Plugin for WordPress, Blogger...