Tuesday, August 02, 2022

Milkmaid/Dream Top Pattern from Lydia Naomi


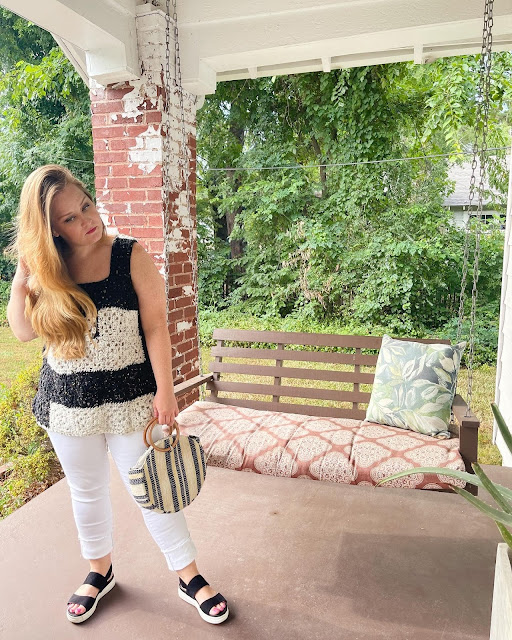
Pretending I’m writing poetry in a field…or milking a cow since this is a “milkmaid” top…but let’s go with the first scenario.


This is the Milkmaid/Dream top pattern from Lydia Naomi. She offered it as a free download a year ago, and I finally got around to making it. Although it’s no longer free, it’s still available to download for an affordable price on her website. I’m going to make the dress version next! She also has a few videos on how to make the dress/shirt and make size adjustments.
I did a separating zipper (like is on a jacket) at the back instead of an invisible zipper under the arm. You’ll probably need help zipping it up if you do the same, but I wanted to give it a try. I raised the neckline by a hair but will probably raise it even more the next time I make it. I’m constantly bending over to pick up a kid, so I’d like the top to come up a little higher. I also made the bottom ruffle a little longer so it wasn’t cropped length.
I really liked making this top and already have the fabric picked out for the dress version! The shirt fabric was given to me by a lady at church and is a screen printed linen. It’s such a nice fabric.

Toddler Dress and Bloomers


When an outfit makes you feel goooood
💁‍♀️
My mom made the top and bloomers for Harlow when she was a toddler, and now Elodie is wearing the outfit. I made the headband when Harlow was little.
The outfit pattern is Simplicity 2375. I realized after the pictures that I should have ironed the top before she wore it, but oh well.

Travel Watercolors

We went camping last week at Bull Shoals-White River State Park. When it was time to pack up, I told Colin I just needed 10 minutes to do something for myself. The trip was full of family time, which is why we went, but I’m trying to carve out time to also do some things I enjoy (by myself ;) ). I decided to start this practice on our last trip to Woolly Hollow State Park.

At this current stage of parenting, I can’t really sit and read uninterrupted for any length of time. Our youngest might wander off! But I can take 10 minutes to sketch and paint with watercolors while she naps or while I keep watch to make sure she doesn’t head for the water’s edge.
I’ve had this watercolor kit for about a decade but it has been neglected for far too long. It’s compact and perfect for traveling. Water goes in the brush handle, so there’s no need for a cup of water. The paints are very pigmented and blend well. I sketch with a pencil then paint over it. I only have a few minutes to work, so I don’t strive for perfection (although, what does that even really mean in art?). I just strive for a minute to do something I enjoy and to capture a moment from our trip. I paint in my notebook where I log our trips.
The rainbow trout represents our time on the White River. The pennant I painted at Woolly Hollow is of the pennant I made from felt and vinyl for our girls’ last birthday party that’s hanging in our camper.
I encourage you to take a few minutes for yourself to do something you love, to try something new, to take in the moment, to show your kids that they can do the same.
I got the watercolor kit at @hobbylobby where you can sometimes catch it on sale. It’s also available on Amazon.
Kit with a different color palette: https://amzn.to/3NZKjVo
What do you like to do when you have a moment to yourself?

Open Back Tank Top

I’ve been wanting to make a top with this hand-me-down fabric for awhile but couldn’t make up my mind on what to do. So I made my own pattern.

Now, I know what you’re thinking, because it’s what I think when I see posts about self-drafted patterns— that doesn’t help me! How am I supposed to make that without any instructions or patterns? Well, if you want to make something similar, go check out Jenna Phipps’ YouTube video DIY Summer Dress. It has a similar look, can be made into a shirt, and is a bit more simplified in that you don’t have to curve around your armpit or have buttons like I did. She’ll walk you through the process. It’s a good beginner project.
Back to what I did…. I wanted the top to be somewhat fitted at the bust, so that meant I needed a way to open it to put it on/take it off. I did buttons in the back. If you go with a looser fit, you can just slip it over your head and skip this. I didn’t have enough fabric to do a ruffle all the way around, so I did a ruffle in the front and left it flat in the back. I also left the back open, because it is really hot here and all the airflow is needed to keep cool. I didn’t do a lining, but I did use a serger to finish all the seams and edges.
I drafted a paper pattern for this so I could get the fit just right and use it for future projects. Making a pattern takes a little more time in the beginning but saves a lot of time in the end when you want to make more of the same top. Making adjustments and changes is easy when you have a base to start from. This garment is my wearable toile and will help me get the pattern just right for future garments. I think I want to do a front button top and no ruffle layer the next time.


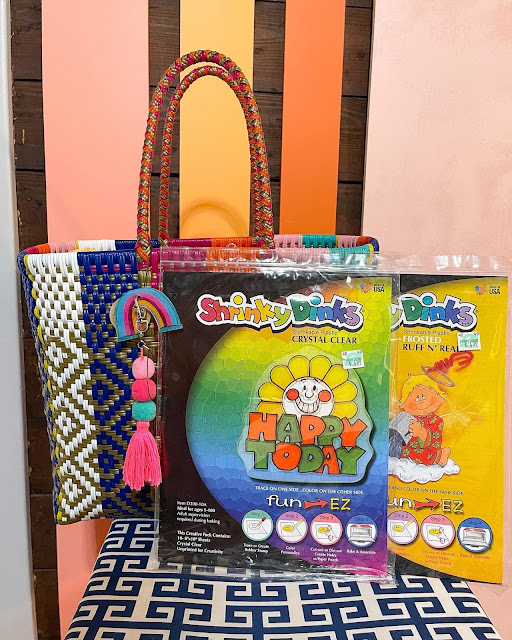
Summer Craft: Shrinky Dinks


There’s a never ending heat wave and drought going on here, so we’ve been looking for indoor activities. Here’s one you may want to try!
About a month ago, I pulled out the shrinky dinks sheets that I’ve had for over a decade. Then, a couple weeks ago, we went to the library for a free activity where you could make shrinky dinks. It’s easy, good for any age (Elodie “helped” me with my rainbow), and addicting!
It’s basically plastic sheets that you draw on, and then they shrink down 10 times their size in the oven. They’re so fun!
I got my sheets on sale at @hobbylobby ages ago. You can also grab kits on Amazon.
Have you ever made shrinky dinks?
I can’t find them currently on Hobby Lobby’s site, but here are some Amazon links.

Learning to Crochet


I was itching to learn something new. I needed to challenge myself but also have an outlet to relax and unwind. I hoped crocheting would tick those boxes.

I watched two YouTube videos on how to crochet granny squares. I pulled out yarn that I’ve had for years that was always too thin for knitting projects I was working on. I had a crochet hook from middle school when a teacher taught a few of us to crochet a line (but I guess we never moved past that or I’ve forgotten).
For a few weeks, I’ve been crocheting late at night after the girls are in bed, while riding in the car, and one last marathon session this past Sunday evening to finish my project.
I decided to make a tank top. I had no pattern. I just drew on garment making knowledge to figure out measurements and construction. I crocheted a ton of granny squares of varying sizes and then joined them together.
The final product is imperfect. It’s a bit too loose, a little wonky in places, and if you look closely, you’ll see I miscounted stitches in places. But I did it! I learned something new and actually turned it into something! You can do the same! You can learn new things. I squeezed in pockets of time to work on it. It took me way too many hours to complete, but I just bit it off a little at a time. I liked that once I learned the pattern of crocheting that particular granny square, it became like second nature and something that I could do to lull my brain at the end of the day.
I keep hearing crafters call crocheted clothing summer attire, but I think since we’re setting heat records over here, this will be something I save for an Arkansas autumn!


Core T-Shirt (Free Pattern)

Here’s a free sewing pattern! This is the Core T-Shirt from Closet Core Patterns.

I made the shirt with linen fabric. The pattern calls for fabric with more stretch, but it worked just fine! The only thing I would change if I made it again with similar fabric is enlarging the neckline so it’s easier to slip on and off since the fabric doesn’t stretch. I also found that I had to cut the neckband on the bias. I made the pattern according to my measurements. It’s very flowy and a bit boxy. I think I could size down, but it doesn’t feel too oversized as is.
I hemmed the bottom of the shirt and finished the sleeves using Sweet Red Poppy serger technique from her free dolman shirt tutorial (which is on my list to make).
This is a quick, satisfying project, and I would definitely make it again. It also comes with a cropped version and long sleeve version.


Related Posts Plugin for WordPress, Blogger...