Turning an adult t-shirt into a shirt/dress/tunic for a child is not a difficult task. It takes beginner sewing skills, some patience, and the mindset that you're okay with not having absolute perfection.
We ordered some shirts for our college group at church, and a 3XL shirt had a bleached spot on the front. The company refunded us for it, and I pulled it to make a shirt for Harlow. I knew that I wanted to make the shirt a little big so it could grow with her. I also wanted to keep it long so she could wear it as a dress or a tunic with leggings. As she grows, it will become more fitted and short enough to be a shirt. If you wanted a more fitted shirt for your child, you can follow these same instructions to achieve that.
This shirt is not going to be perfect. I don't have a serger, which is necessary to completely recreate a shirt. My measurements are barely even measurements. This is more of a fun project that you can do in a snap. Have an old band tee that would look adorable on your toddler? This is the perfect way to get that rock-n-roll, easy style.
You just need a pair of good scissors (buy some fabric scissors...they're not expensive, and they'll make your job easier) and a simple sewing machine. You might also want some elastic.
Let's get started! Click the photos to make them larger.
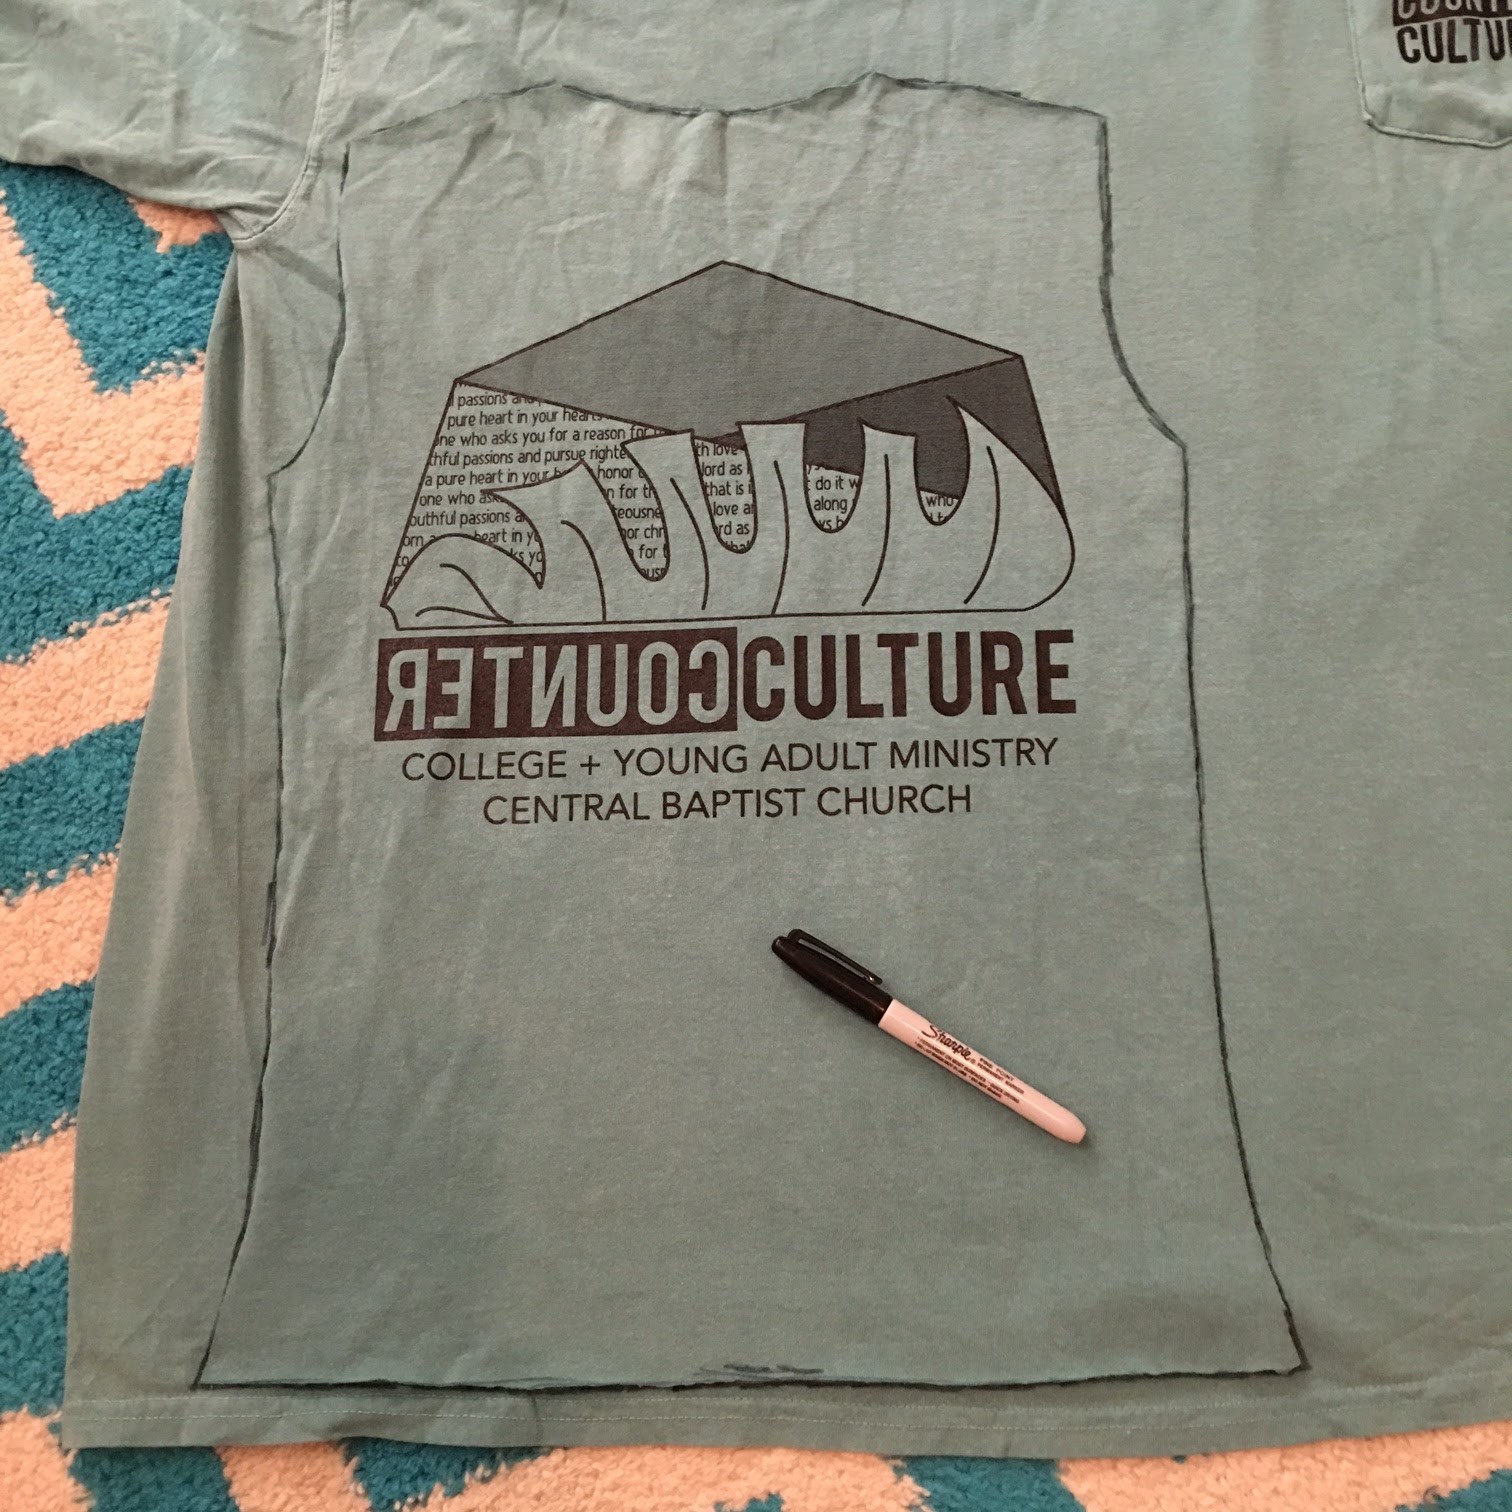
The front of the shirt has a pocket, and the back has a large design. I want the back of this shirt to be the front of the toddler shirt. I'm not going to be using the pocket in this project.
To make the toddler shirt, you could take your toddler's measurements, asking her to stand still and to stand up straight and to let you measure everything needed to make a custom shirt. You go right ahead. I grabbed two items out of her closet to use as guides.
First, I grabbed an oversized tank. Harlow wears a 2T and is almost fitting into 3T items. This tank is a 4T, making it very large on her. It fits her like a tunic. I used the tank to get all the measurements. I want this shirt to fit her like the tank. Second, I grabbed a dress. I want this shirt to be a little longer than the tank so she can wear it as a dress. I grabbed a dress that hits her a little below the knee to use as a guide for the length.
First, I traced the top and sides of the tank. Then I made a mark where the bottom of the dress fit and freehanded the length across the bottom. I made sure to trace away from the tank and dress a bit to leave room for a hem and seams. You can leave 1/4 inch, 1/2 inch, 5/8 inch, whatever floats your boat for seam allowance and a hem. You do you.
Now cut that tank out with some good scissors, making sure to only cut into the back of the shirt-- don't cut the front yet!
Since tracing a tank doesn't insure perfect measurements, I folded the shirt in half and trimmed any material that didn't match up. This doesn't make the measurements perfect; it just makes them match so your finished product isn't crooked...or any more crooked than necessary.
Now that the front of our shirt-in-the-making is cut, we're going to use it as a template to make the back of the shirt...that we're cutting out of the front of the shirt. Got it?
Lay the freshly cut shirt down on the front of the shirt, and trace around it as closely to the shirt template as possible. Then cut out what you just traced. Now you have a front and a back!
Place right sides together, and pin in place. Get that sewing machine ready.
Sew the sides together (photo 1). I just used a straight stitch, but use a zig zag stitch or serger if you prefer. Somebody get me a serger!
Be sure not to sew the neck opening, arms, or bottom. Just the sides!
Next, fold and pin the bottom of the shirt to make a hem. I just folded it once, but folding it over twice would mean you wouldn't have any raw edges showing on the inside. Or you can use a serger...which I don't have. Sew up that hem! (photos 1, 2, 3).
At this point, I went ahead and "hemmed" the arm holes in the same way I sewed the bottom hem. Somehow I didn't get a picture of it, or I deleted it. The original tank that I used for measurements had the armholes sewn with a serger instead of hemmed. Oh, a serger would be nice. Except that's one more machine I'd have to switch between.
Now comes the part that seems like would be really intimidating, but it's really not! Let's put a collar on this shirt!
I got out that tank again and measured where the neck started at the shoulders on both sides and where it came down on the chest. Make those three marks with a sharpie.
Cut the collar off the shirt we're destroying (photo 1). Use the tank to measure what size the collar should be (photo 2), cut but leave room for some overlapping for the next step (photo 3), then sew the ends of the collar together, folding over the raw ends (photo 4).
Lay the collar right side down (face down) on the shirt. Use the three marks (2 shoulder markers and 1 chest mark) as guides to where the collar should be pinned. Pin the collar around the neck of the shirt (photos 1 and 2).
Sew the collar to the shirt (where my nail is pointing in photo 3).
Once sewn into place, trim away the excess fabric sticking up out of the neck, trimming close to the collar but not cutting into the collar (photo 4).
You just put a collar on a shirt!
This last step is optional but is something you'll want to do if you're making the shirt oversized like I did. I didn't want to the shirt to completely swallow Harlow up or to fall off her shoulders. I added some elastic at the upper back. In my opinion, a thinner elastic works better, but I used what I had in my stash.
Mark where you want the elastic to go when it's fully stretched (photo 1).
Sew one end in place. Then stretch the elastic to it's next mark, and sew that end in place (photo 2).
Sew down the center of the elastic, stretching it as you go (photo 3).
When you let go of the elastic, it will cinch back up, cinching the shirt with it. Again, a thinner elastic will "ruche" a bit more and give the look I was really going for. I may replace the elastic once I can run out and get the thinner elastic. Can you tell I'd rather have used thinner elastic?
Now you have a completed shirt! This top should last Harlow for a few years!.
I hope this gave you some inspiration of making some KEWL (the kids still say that, right? 😂) clothes for your kiddos. It's a fun project that doesn't require perfection!