Friday, October 30, 2015

Harlow's First Birthday- Crown & Headband

The birthday girl got a crown for her birthday!  Everyone has this crown at their home-- it's made from a toilet paper roll!
Take the cardboard from a finished roll of toilet paper, cut the top to resemble the top of a crown, paint it pink, paint glitter on top, cut a small slit to slip a hair clip in-- Voila!

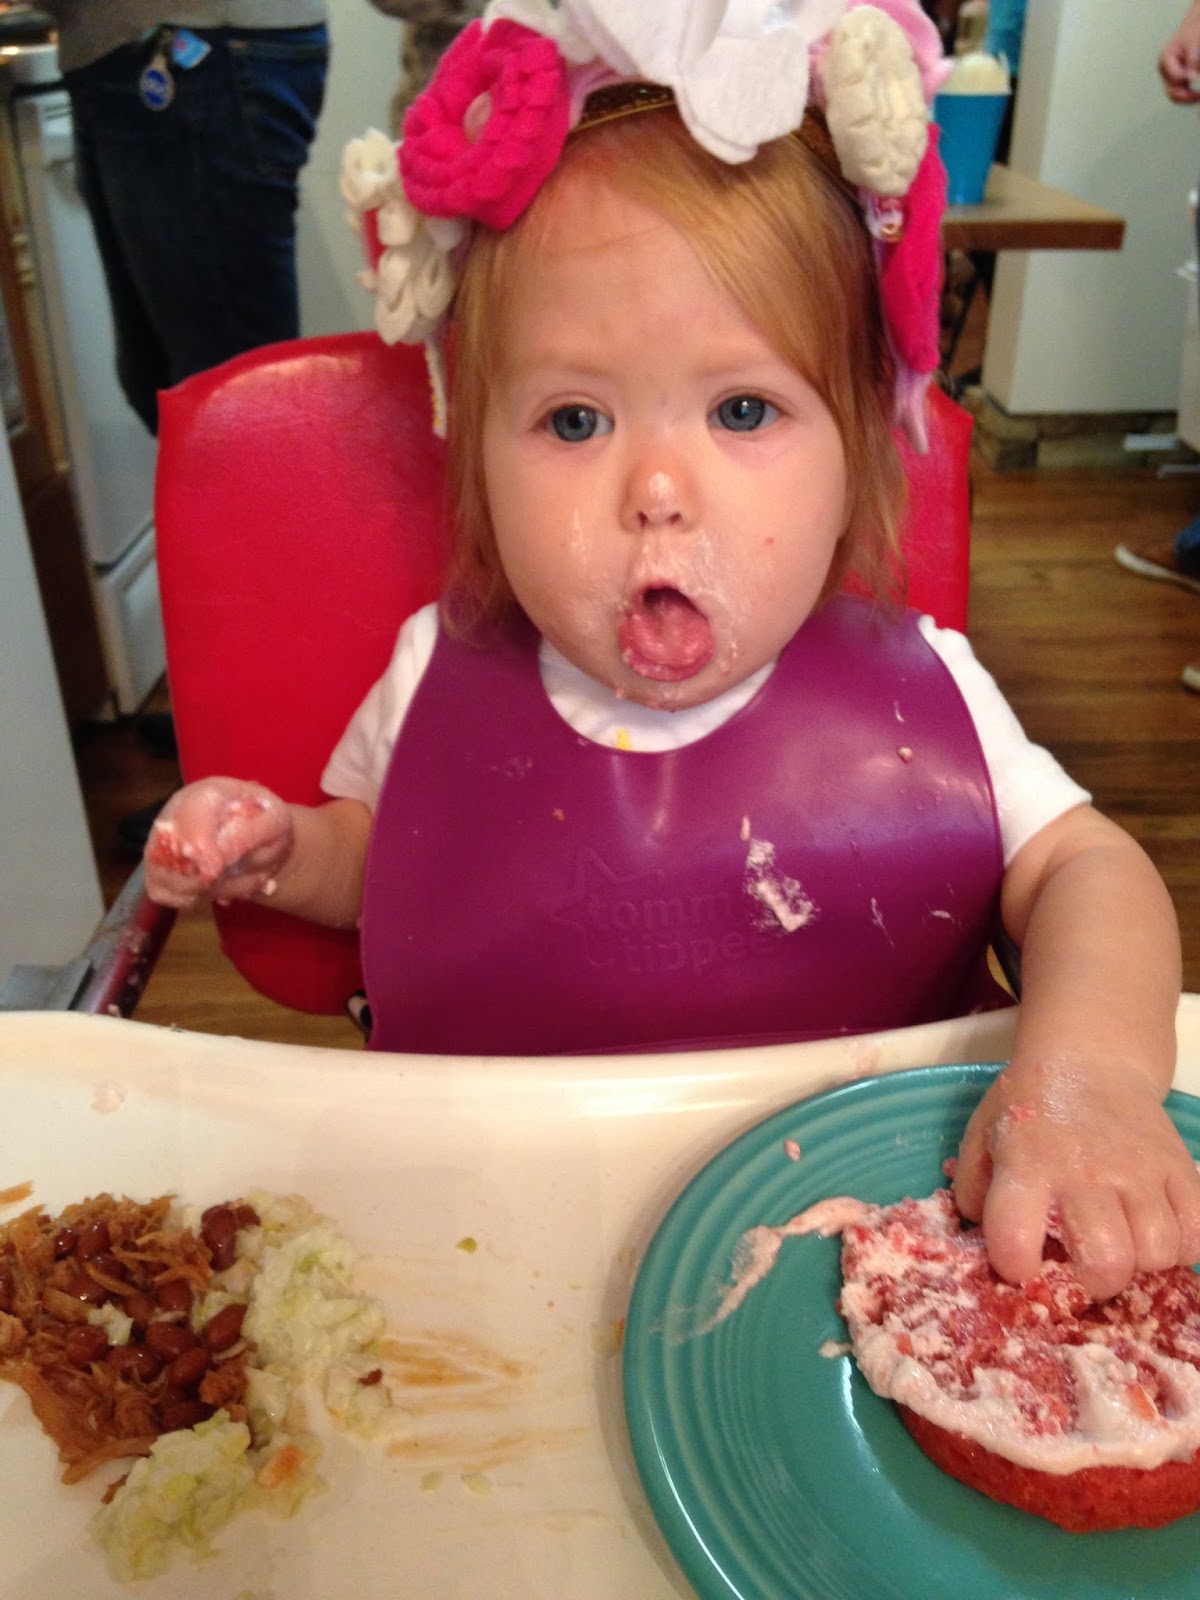
For her birthday party, I made Harlow a felt flower crown.  Here were some sites of inspiration: tiny turbans and VictoriasClass.

I searched Pinterest for tutorials on how to make different styles of felt flowers.
I hand-stitched buttons on some of the flowers and stitched sequins and beads on some of the leaves.

I then used a combination of fabric glue and hand-stitching to attach the flowers and leaves to a strip of felt.
I laid a piece of floral wire on the back of the strip of felt and glued another strip of felt on top.  This allowed the flowers to bend to the shape of Harlow's head.

I glued a hair clip to the center of the finished felt strip and clipped it to a stretchy headband that I purchased.
I used floral wire in two other places to attach the crown to the headband so it wouldn't move.


Grown-ups can wear these too, right?

Thursday, October 29, 2015

Harlow's First Birthday- Alphabet Book


Most of Harlow's birthday (decorations, outfit, gifts) was handmade.  It was my way of making it a special day and tailoring it to her personality.  It's also my way of saving money (truth!).  For one of her gifts, I made her a book, because she loves to read.


I created the pages in Adobe Illustrator, but it could just as easily be done in a Word document.  The book pages are 8 1/2 x 11, so the pages print easily.

I used Myriad Pro font for the wording.  The large floral letters are the free font Florabet.  The font used for her name on the cover is the free font Willow.

I made sure to leave space in the left margin to hole punch.

I used watercolors to paint the floral letters on each page.

Once the paint was dry, I took the pages to a teacher supply store and had them laminated.

Lastly, I used a hole punch and book rings to bind the pages together.


This is one of my most favorite things I've ever made.  It's not complicated or expensive, but it's a reminder to Harlow of how special she is to us.

…And as I sign off for the day, here's a peek at her party invitation that went out to our family.  I used Illustrator to make the invitation, and design elements are from Angie Makes.

Wednesday, October 28, 2015

Harlow's First Birthday- Embroidered Shirts & Fun Shorts

Almost three years ago, I used money and gift cards I got for Christmas to buy an embroidery machine.  It took me two and a half years to finally plug it in and learn how to use it!  Ridiculous, I know.

Now that I know how to use it, I embroider everything in sight! (I have a Brother HE1 Embroidery Machine.)


The cake design I used for the onesie Harlow wore on her actual birthday and on the onesie she wore to her party is from Planet Applique (click HERE to get 20% off).  The number 1 on her birthday onesie was traced, cut, and sewn on with my sewing machine.  The font on her birthday and party onesies were fonts stored in my embroidery machine.


Her shorts were inspired by this link I found on Pinterest.  The fabric is from Hobby Lobby, and my mom altered a bloomers pattern to make the shorts.


Harlow's actual birthday fell on a Wednesday, and her party was on Saturday so all of our family could celebrate with us.

On Wednesday Colin and I took Harlow to a pumpkin patch.  I embroidered the pumpkin design on a piece of fabric, cut the fabric into a circle, then stitched it on the onesie with my sewing machine.  I wanted to be able to use a seam ripper to remove the pumpkin design circle and use it on shirts in the future (hence why I didn't embroider it directly on the onesie).

The pumpkin design was a free appliqué from Lynnie Pinnie.  I used a font file that I had to monogram the H.


If you embroider, PLEASE leave me a comment with your favorite embroidery websites and software!  I'm still so new to this; I could use all the help I can get!

Here are a couple other embroidery sites I like:


Here's a bonus embroidery project…
I had a shirt with an owl on the front and turned it into a pillow.  I cut the owl design off the shirt, embroidered Harlow's name on it, sewed it into a pillow, and stuffed it with fiberfill.  This was literally the second thing I ever embroidered.  I told you I want to embroider everything!


Tuesday, October 27, 2015

Harlow's First Birthday-- Homemade Tent

I contemplated for months on what to give Harlow for her first birthday.  I wanted it to be special, be age appropriate for now but also grow with her and be lasting.

Harlow loves books and loves for us to read to her.  I kept having the thought to make her a tent where we can play for now and where she can go to read when she gets older.  There's something special about having your own space where you can hide away and pretend.

The tent was a hit!  Colin made the frame, and I sewed the fabric.  It folds up out of the way if you need to store it, but we're keeping it out in the house, because it's too fun to hide!  The link to the tutorial is down below.


Get the tutorial HERE :)


Monday, October 26, 2015

Harlow's First Birthday-- Strawberry Cake & Strawberry Icing


Strawberry cake is my favorite, and I knew I wanted to make it for Harlow's party.  Who can go wrong with naturally pink cake?

I found a cake recipe and tested it out as my birthday cake back in July.  It passed the test!  The icing recipe that accompanied the cake recipe was too runny, though.  It was yummy and perfect for a sheet cake, but wasn't thick enough for a layer cake.

I found an icing recipe in a cookbook I had and made a batch to test it out.  The icing can last up to 3 months in the fridge, so I made it early so I had time to find another recipe if I didn't like it.  Well, it was delicious!  And thick!

I made Harlow's cake two days before her birthday and put it in the fridge.  That same day I added mashed strawberries to the icing and kept it stored in the fridge.

Both recipes are pretty easy and are SO TASTY!

It was a hit at the party.  But don't take my word for it…just ask Harlow!

The cake recipe will make one cake.  I doubled it to add cupcakes and Harlow's small smash cake.  I doubled the icing recipe and had a small amount left over.

*Easy Strawberry Cake recipe from Call Me PMc

*Bakery Frosting recipe from The Taste of Home Cookbook
  • 2 cups shortening (I used organic vegetable shortening)
  • 1/2 cup powdered nondairy creamer
  • 1 teaspoon almond extract
  • 1 package (32 ounces) confectioners' sugar
  • 1/2 to 3/4 cup water (or less if you're adding strawberries and their juice-- I added a little less than one small carton of smashed strawberries)
  • Food coloring, optional (I didn't use any)
1) In a large mixing bowl, beat the shortening, creamer and extract until smooth.  Gradually beat in the confectioners' sugar.  Add enough water until frosting reaches desired consistency.  Tint with food coloring if desired.

2) Store in the refrigerator for up to 3 months.  Bring to room temperature before spreading.

Yield: 8 cups


Related Posts Plugin for WordPress, Blogger...