Showing posts with label birthday. Show all posts

Wednesday, October 13, 2021

Camping Themed Birthday + Campfire Cake


This year's annual birthday planning had to include TWO girls since Elodie turned one this month. Harlow turns seven later this month. I needed a cake theme that fit both of them. I went with camping since we've spent the last few months camping as a family.


I made the Stanton State Park pennant with my Cricut and personalized a shirt from Walmart for Colin. Stanton is our last name, but if it was a real state park, we would have tie dye uniforms. 😄


Here are the cake details:
  • The cake is strawberry, and the recipe is from Call Me PMc. I was careful to find a cake mix that was milk free.
  • The filling icing is bakery frosting. You can find the recipe in this past post. I think it's best to make this icing ahead of time and let it sit in the fridge to let the flavors mix together. I added vanilla in addition to almond extract. This isn't a frosting I recommend making the day of or even day before. It won't taste right. It will taste like vegetable shortening. It needs to sit! A few days before serving, add chopped mashed strawberries. I think this icing is best when it has strawberries in it. You can even make it, strawberries included, and store it in the freezer if it's going to be a couple weeks before you serve it. Take it out to thaw in the fridge for a couple days.
  • I wanted the outside icing to be white. I didn't make the bakery frosting for the outside, because I don't like it without strawberries. My youngest daughter has a milk allergy, so I needed a recipe that was dairy-free. I made 7 minute frosting for the first time, and it was delicious! It tastes like marshmallows. I had to mix it for much longer than 7 minutes, but it eventually did get to the whipped consistency. I will definitely be making it again!
  • The dirt is gluten free crushed Oreos (wanted to see how they compared in taste to the original). The logs are dark chocolate Pirouline. I followed this tutorial to make the flames. I made the little campers with a candy mold from Michael's and white melting chocolate and food dye. The gummy worms are Albanese-- the yummiest gummy worms in my opinion. I didn't get a picture of the 1 and 7 candles, but they were cute and fit the theme. 😆
  • I made Elodie a mini "smash" cake. It also kept her from having the couple items I added to the main cake that had dairy (campers, Pirouline).


Monday, October 26, 2020

Halloween Chocolate Cake with Peanut Butter Icing

My oldest daughter turned 6 this month. I usually make a cake from scratch or alter a cake mix or go all out with the cake decor. Since I was making the cake with a 2 1/2 week old baby in the house, I needed to try to make an easier cake this year. This is what came out!


The cake is Duncan Hines Dark Chocolate Fudge box mix. It's a yummy cake and so much quicker and easier than the chocolate cakes I usually make from scratch. Yes, I prefer my scratch cakes, but if you put enough icing, any cake tastes delicious!

The icing is the one thing that's homemade. I'm an icing fan, so I think it's worth the bit of extra work to make your own instead of using store bought. The peanut butter icing recipe is from Brown Eyed Baker, and I covered the cake with her chocolate ganache recipe, too (in the same post as the icing recipe).
I knew I wouldn't have time to make my own cake decorations since I was home alone with a newborn. Thank goodness Halloween candy is out right now and comes in different shapes and colors! I used Reese's peanut butter pumpkins, bats, and ghosts. They all kind of looked liked blobs, so I used icing gel to differentiate them. The gel melted a bit on the bats, so you still can't tell they're bats 😂.  I used lollipop sticks (from Michael's, I think) to put the Reese's on the cake. I had the sprinkles already, but I think they're still available at Walmart with the fall cake items. The gold candles are from Walmart. The number 6 is a Wilton candy piece from Michael's. On the front of the cake is "Witch's Brew" Kit Kat green candy bars, and candy corn is along the back of the cake. The candy corn "leaked" a bit in the fridge. Let's pretend that's part of the Halloween aesthetic. 


The cake was yummy and perfect for an October birthday. If you have the time and the motivation, I definitely recommend making the cake from scratch. If you're short on time, the Duncan Hines mix is a good substitute. You don't have to tell anyone that it's a mix! The icing is good by itself...on a spoon...in case you wondered.

Friday, October 27, 2017

Embroidered Fox Raglan Tee


For Harlow's third birthday, we had a pumpkin patch party.  For her first birthday, I made a pumpkin shirt, but I don't really want to dress her in a pumpkin shirt once December gets here.  I wanted something that wouldn't look out of season once fall is over.  I thought this fox design was perfect for a fall birthday but would still be cute through spring!

The fox design is actually an appliqué, but I skipped the appliqué stitches on my embroidery machine and just did the satin stitches (or whatever they're called) that you see.  I did the H the same way, skipping the appliqué.  The H is also from Planet Appliqué, and (if I remember correctly) it's the Landon Alphabet.  Side note: I got the fox and alphabet for free!  Planet Appliqué offers free files on occasion.  Follow her on Facebook and sign up for emails to know when free files are available.

I used Sew What Pro to resize the fox and H and to remove the overlap stitches.


The raglan tee is from Walmart for less than $4!  Be sure to order it through ebates to get cash back!

I paired this top with a fox bow that was from my boutique I owned.  When I found out I was having a girl, I immediately bought the bow from the lady that made them for my store!

A toddler in a fox shirt is about the cutest ensemble.  And raglan tees-- the best!


Tuesday, October 24, 2017

Pumpkin Shaped Chocolate Cake

Our daughter turned 3 on Saturday, and we took a trip to the pumpkin patch to celebrate.  We have done this every year on her birthday since she was 1.  This year both sides of our family came with us, and we did this in place of a party like we've done the past two years.

Since we were going to the pumpkin patch, I thought a pumpkin cake would be fitting.


I used a bundt pan to make the pumpkin shape.  You can search Pinterest to see loads of ways to use bundt pans to make a pumpkin shaped cake.  My bundt pan is silicone, so it doesn't have quite the shape most pans have.  It doesn't make as defined ridges as I would have liked for the effect of a pumpkin look.

One side of the cake lined up perfectly, but the other side you can see (below) was off just a tad and showed the "joint" where the two bundt cakes met.

I made a chocolate cake that I thought was pretty delicious!  When you click to that recipe, you'll see an icing recipe that I'm sure is yummy too, but I actually make the cream cheese icing recipe from the Better Homes and Gardens cookbook.  Just about any icing would be good on this cake.

I needed to make more than the cake recipe said in order to baked two bundt cakes, so I made the recipe and then made half of the recipe (so 1.5 of the recipe) to make two cakes.

This cake is dense, moist (sorry if you hate that word-- ha!), and the perfect amount of chocolate.

To join the cake in the middle, I added cocoa powder to the cream cheese icing to make chocolate icing to keep the cake together.  I think the chocolate cream cheese icing was the best (Colin disagrees and thinks the plain cream cheese on the outside was the best.  It works out in marriage, because I can eat the middle, and he can eat the outside!).

I initially was going to add food coloring to the icing to make an orange pumpkin, but I decided to make a white pumpkin.  I added a little water to some of the chocolate icing to "paint" lines on the pumpkin cake.

The stem is an ice cream cone that I covered in icing and rolled in gold and red sprinkles.  I then put the cone in the freezer to set before putting it on the cake.

I then added a few sprinkles around the "stem" and at the bottom of the cake.

It's not the most professional looking cake, but Harlow loved it, and it was pretty tasty!


We kept it in an ice chest with dry ice while we were at the pumpkin patch (it was a warm day!).  Some of the icing came off as it touched the sides of the bowl covering it.  It didn't affect the taste, though!  If I make a pumpkin cake again, I think I'll search for a different bundt pan.  Other than that, it was a fun and delicious cake to make!


Tuesday, November 01, 2016

Embroidered Fish Banner

I didn't want Harlow's birthday shirt to have a number on it this year or a fish (her theme), but I wanted her to have something to mark her second birthday party.  I made a banner to hang at her party and have plans on how to use it after the party (stay tuned for a future post!).

The fish and wave designs are FREE!  I hand stitched sequins on the fish for an eye.  The font I used for the name is from Boutique Fonts, and the number 2 is from Planet Appliqué (click HERE to get 20% off at Planet Applique).  I used Sew What Pro program to combine all the files into one design.

I sewed a hem to put a dowel rod through and strung it with twine.  I got a pack of dowel rods in the craft sections of Walmart for pretty cheap.


Friday, October 28, 2016

DIY: Felt Bows


I love the look of felt bows.  They're versatile and cheap and easy to make.  I made three different bows which happened to go with three different outfits for three big days.  You can do this with minimal craft experience and for a couple bucks.

Let's get started!

^ I wound up not using the fabric, sequins, or elastic headband.  Not pictured: hair clips from Hobby Lobby in fabric section (usually on end cap by ribbon)


I found a few tutorials on Pinterest for felt bows but in the end went with the template from oliver + s.  One difference I made to her tutorial (which many of you should rejoice over) was I used glue instead of sewing.

For some reason I cannot find a single photo I took while making these.  What a great tutorial this is going to be!

You'll be fine if you follow the oliver + s template and tutorial. When you get ready to assemble the bow, use craft or fabric glue if you don't want to sew.  When you get ready to glue or sew the last piece (the center piece that in my picture below has ribbon wrapped around it), be sure not to glue the back of the piece to the bow.  Meaning: The ends of the center strip meet at the back.  I glued the ends on top of each other but did not glue the ends to the back of the bow.  That will allow me to slip a hair clip through the back.  You can glue the hair clip in place then if you wish.  I didn't glue it, so I could remove the clip if I wanted.

For two of the bows, I wrapped ribbon/craft fibers around the center and glued them in place.  I also glued that center piece to the bow on the top (but not on the back, remember, so the hair clip can slide in).

For one bow, I did not glue the center piece on the back or the front, because I wanted to clip an antique earring on the front.

These bows are so quick to make, and felt is pretty inexpensive!  Embellish however you like!


^Harlow on the day of her birthday party wearing the bow with the antique earring

^ Harlow on her birthday at the pumpkin patch wearing the two bows with ribbons at the bottom of her pigtails.


DIY: Upcycled Mylar Balloon Banner

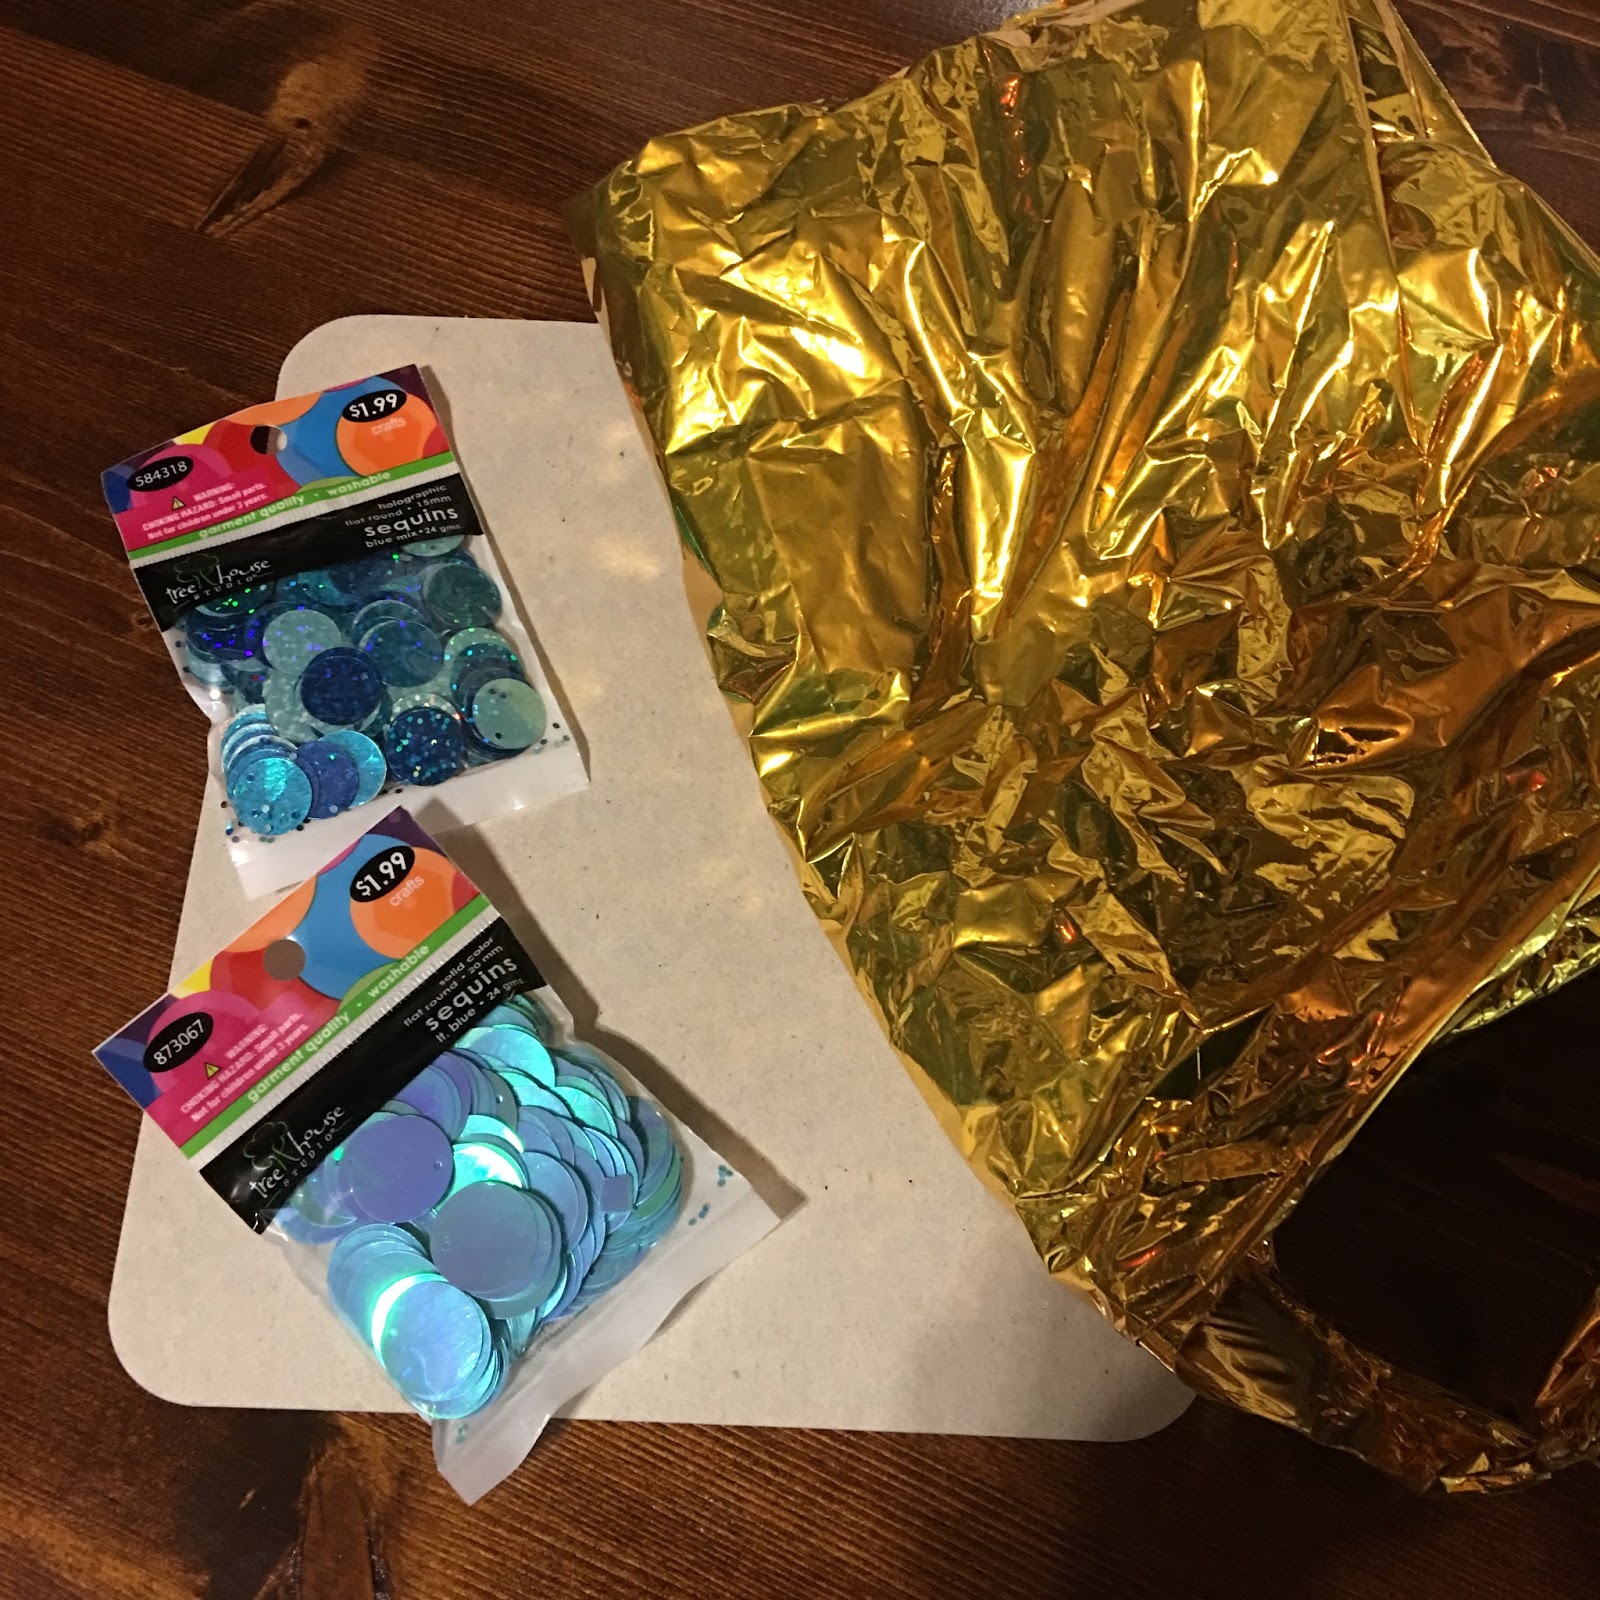
I know not everyone is a craft hoarder like me.  If I think something can be used for a craft, I hang on to it...like the huge number 1 mylar balloon from Harlow's first birthday.  Given that not everyone may have an old mylar balloon at their disposal, I know this craft may not be for you.  But even if you have a deflated mylar balloon from the grocery store that your kid just had to have, you could use that.

I took the mylar balloon and turned it into a banner for Harlow's second birthday.  It's simple, doesn't take much time, and requires minimal supplies.  I added an H to the banner that would require the purchase of cheap sequins if you decide to do something similar.  Harlow's birthday party was fish themed, so I was trying simulate fish scales.

Let's get started...


  • Take apart the balloon.  I cut all around the edge.
  • Begin cutting the balloon into strips.  There isn't a lot of rhyme or reason to this.  I tried to keep the strips close in size.  I was able to use most of the balloon since the number 1 was basically just a rectangle.
  • Put a few strips (around 6 or so) together and fold them in half.
  • Twist the top half a couple times to make a little hole at the top.
  • Use string (I used the string from the balloon) to tie the twist in place.
  • Scroll down for more...


Let's take a break to admire how quickly a toddler moves...

  • I cut an H from cardboard and glued string to the back, using tape to hold the string in place until the glue dried.
  • Get your sequins ready.  Glue them on the cardboard, making sure to turn them where the sequins layered on top cover the holes in the sequins.
  • Scroll down for more...

^there's that toddler hand trying to steal some sequins again...

  • I used twine to string the mylar and the letter.
  • Each time you add something to the twine, tie a knot to keep it in place and to keep it from sliding around the twine (not pictured).


Hang that baby up!

For the party I added some of Harlow's books that have fish in them, the favorite part of books for her.

I think I'll be leaving this up for a while.  I like the shiny addition to the dining room!  This is a cheap craft if you have a balloon floating around your house!


Related Posts Plugin for WordPress, Blogger...