

I truthfully don't know what to call this project. It's a board turned clipboard, and it's kind of the farmhouse style, so let's go with farmhouse clipboard. :)
Colin and I decorated the college room at church, and I wanted a way to display Bible verse art or photos or whatever. I also wanted to be able switch out the pages to change things up every now and then.
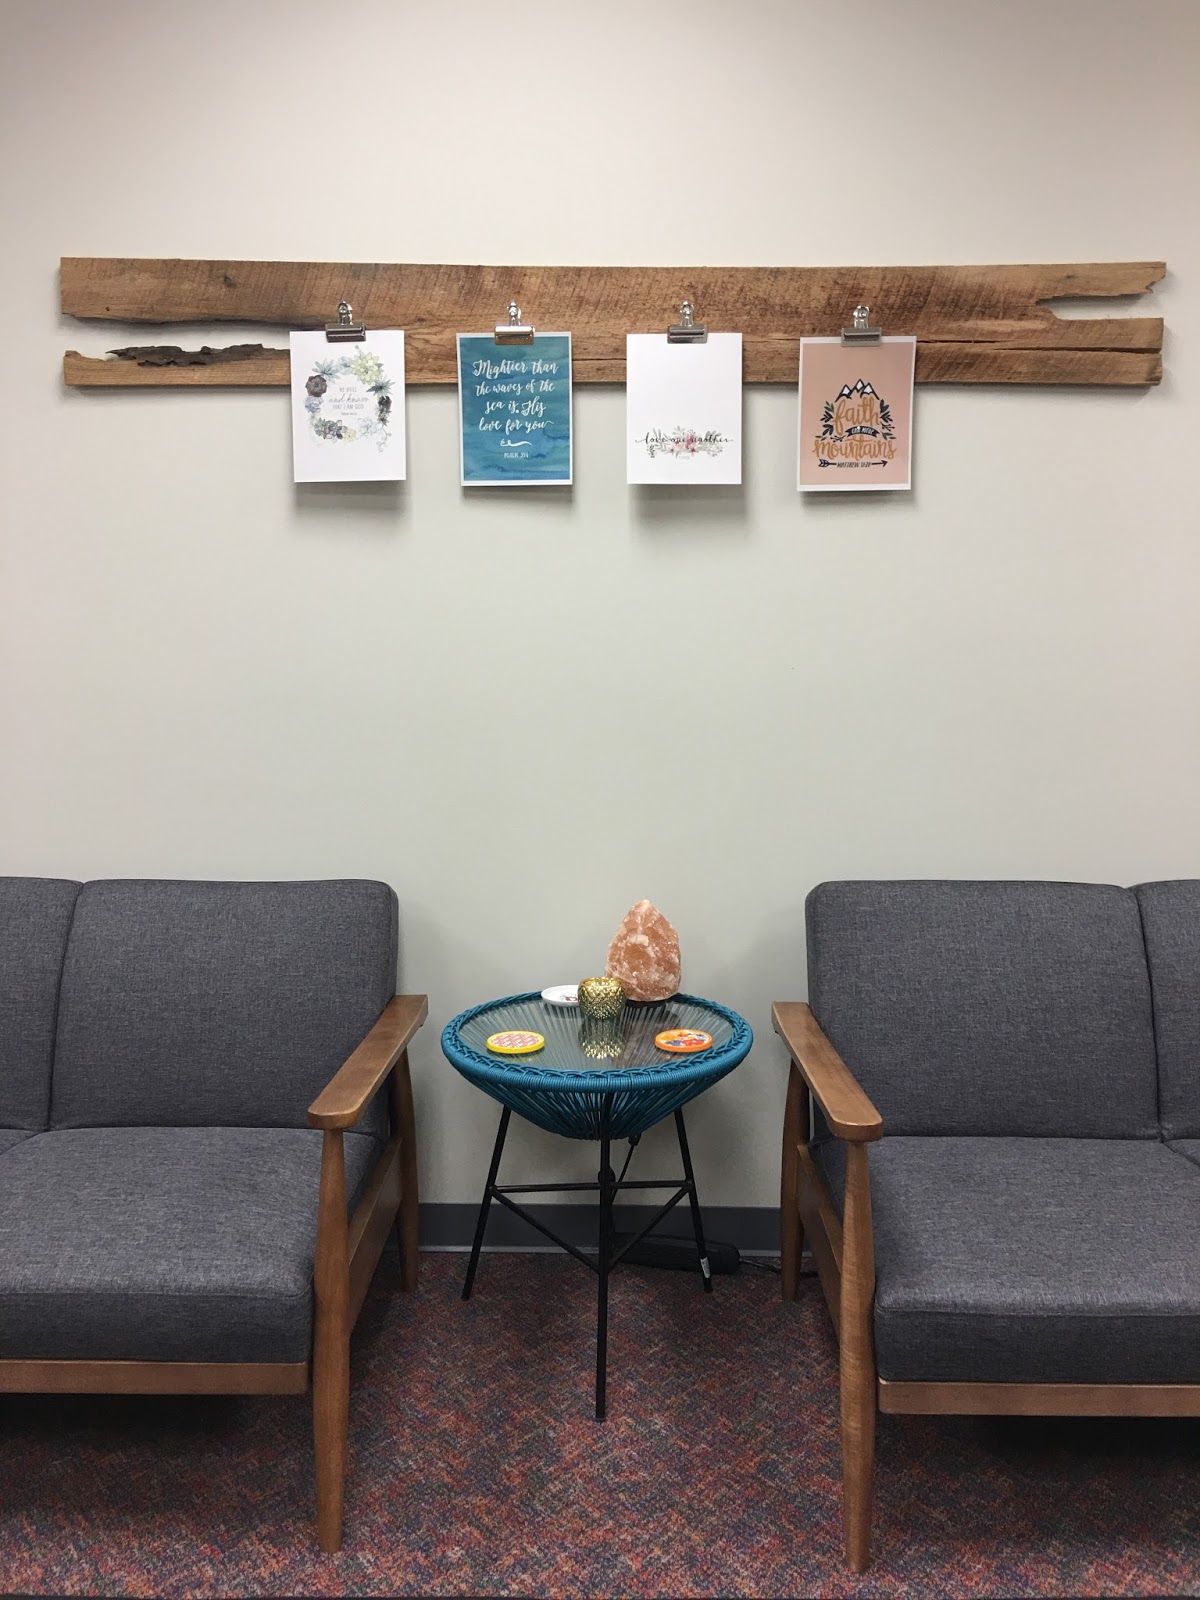
I had a traditional clipboard idea that I may still use, but I wanted something that would make a little more impact and take up a bigger space over the sofas. That is how the farmhouse clipboard was born.
It's an incredibly easy DIY that you can do for less than $20. Let's get started (it's all of maybe three steps-- ha).

Grab a board. This is rough cut timber, but if you don't have access to a sawmill, you can use reclaimed wood, or go buy a board from Lowe's/Home Depot.
The clips are bulldog clips from Staple's (order through ebates for cash back). I can't remember if these clips are the 3 inch size or smaller. There are several sizes to choose from to fit the size of your board.
Now grab some nails and a hammer, and nail the clips in place through the back hole of the clip. You could also screw them in place (duh).
On the back (not pictured), Colin nailed two sawtooth hangers to hang the board-- like these from Lowe's (again-- don't forget to order through ebates so you get that free money!).
Hang the board, then clip your photos, and you're done!

Easy peasy lemon squeezy!
I love the look of it and wish I could find the right place in my house for one like this.
I'll share more photos from the space soon!


No comments:
Post a Comment